Tuesday, October 26, 2010

Importance of Cleaning up Leaves


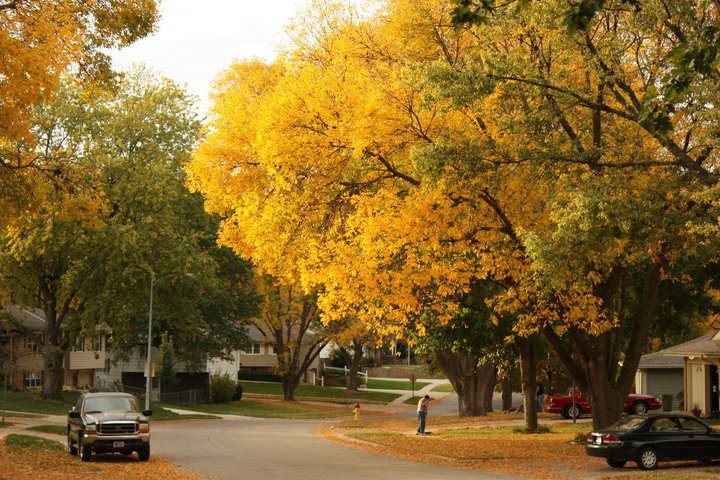
The trees are dropping their leaves and it is important to prevent a heavy layer of leaves from building-up on your turf before winter. Heavy layers of tree leaves that shade the grass can smother and kill grass yet this fall. Plus tree leaf cover favors snow mold, which should still be fresh in our mind from last year's damage. If you choose not to compost them on site, the easiest way to dispose of leaves is to simply mow them in to the turf.

Cool-season turfgrasses require mowing well in to the fall anyway, so regular mowing during the fall will chop the leaves in to small pieces and allow them to filter in to the turf. Research at Purdue and other Midwestern universities shows that tree leaves can be mulched without any detrimental effects on the soil or turf. Actually, just the opposite may be true where tree leaf mulching may help improve the soil and/ or turf.

Not only is mulching leaves with a mower much easier than raking, blowing, and/ or vacuuming the leaves like we have done in the past, other benefits include:
- Minimizes waste in landfills.
- Reduces municipal costs for leaf pick-up and disposal.
- Improved water infiltration in to the soil.
- Helps reduce a source of phosphorus in our surface waters. A number of studies reported total P in urban runoff is highest in fall at the time of leaf drop. Tree leaves moved to the streets could leach phosphorus, which could move in to the storm drains and eventually in to rivers and streams. Keeping them on the turf will allow for better absorption of leached phosphorus.
- May help reduce broadleaf weeds on very low maintenance areas.

Turf iNfo for the North Central US | University of Nebraska – Lincoln turf.unl.edu

Monday, October 18, 2010

Choosing the Right Contractor

There are many questions you may have while looking at a potential project on your property. You have a world of ideas on what you want to do, but may not have an idea of where to start. A quality contractor can help you from your starting idea all the way through completion.

But how do you choose from all of the contractors in your area? There are many steps you go through when figuring out who to hire. You check with friends on who they have used, check the Better Business Bureau, take a look at rating sites like Yelp or Angie's List, you may even post the question to all of your friends on Facebook. Regardless of how you get your information, you still have a decision to make.


There are several things to keep in mind before making your final decision.
  1. Do they comply with state and local codes and regulations.
  2. Do they have the proper certification for the work they are doing.
  3. A quality contractor does not offer price as the only consideration. Often times the cheapest in the short run is not the cheapest in the long run.
  4. Check out references and/or portfolio.
  5. Ask if any sub-contractors will be used and what work they will be doing.
  6. Are they insured.
  7. Check with local building supply retailers. An established contractor with a reputation for using quality materials and paying his bills with suppliers is more likely to do quality work for you. If need be, during the interview process, ask where they get their supplies from.
  8. How many projects like yours have the completed in the last year. This will help determine how familiar they are with the type of work your project requires.
  9. Do they listen to you and your ideas or are they pushing theirs on to you. It is your home and your investment and you want to be happy with the final project.
  10. Get the final agreement/ plan in writing.

Choosing the right contractor is not always an easy process, but it is the most important step in your project. When you choose the right contractor you have peace of mind that your project will be done on time and that you will have quality workmanship that will last for years to come. Remember that price isn't the only factor to consider. If a project is done too cheap you will have to re-invest money again to get things fixed. And believe it or not, this can be as soon as 1 year down the road.

Remember, this is your project! Your satisfaction is the most important thing!

Sunday, October 3, 2010

Planting Spring-blooming Bulbs - A Fall Tradition

Tobias and I just love fall! The weather is so welcome after the heat and humidity of summer and the colors, textures and aromas of the season are so fabulous. We know winter is coming so you want to make the most of every minute we can spend outdoors now.


One of our favorite things to do this time of year is plan our spring landscape beds. Tobias doesn’t care too much about which colors or specific plants I select at the garden center as long as he gets to help with the digging and the occasional batting around of a bulb!


A word to the wise about shopping for bulbs: if you’re not exactly sure what you want, take your time and read the bulb labels carefully. They contain all the information you need to determine how many bulbs you’ll need, how to plant the bulbs, what you can expect as far as the size of the plants and blooms and when the specific plants will bloom. Tobias suggests wearing comfortable shoes for walking up and down the aisles at the garden center.


Are you ready to get started? Here we go.


Bulb selection
Purchasing high quality bulbs will help to ensure future numbers and size of blooms. While top quality tulip and hyacinth bulbs are usually desirable, smaller bulbs will usually suffice for snowdrops and daffodils which easily grow and multiply each year. It is important to choose healthy, fresh bulbs.


Site selection
Most bulbs require 6-8 hours of sun per day in order to make enough nutrients to grow, make it through the winter, and flower the following spring. However, if you planning on planting new bulbs each fall, your site options increase. This is because in early spring when the foliage of the bulbs begins to emerge, there are few leaves on trees to provide shade; therefore, any bulbs that are planted under deciduous trees or in shady areas will receive enough sun in order to bloom satisfactorily for the first spring. Snowdrops and winter aconite are the first to show up in the spring, usually in March. These are soon followed by crocus, scilla, and chionodoxa. These are followed by the hyacinths, daffodils, and tulips. Bulbs are usually sold with a label that will give information on bloom time, bloom size, and hardiness.


Soil preparation
Properly preparing the soil for bulb planting is important. Good soil drainage is essential in raising bulbs. If you have a soil with a high clay content, it can be improved by adding compost, peat moss or some other source of organic material. The organic material should be worked in the top twelve inches of soil. A fertilizer specifically formulated for bulbs can be applied according to label instructions at the time of planting. The fertilizer should have a high amount of phosphorous. Bone meal is a great organic source of phosphorous but should be avoided in areas where skunks and rodents may be tempted to dig up the bulbs in their search for the “buried bones”. Having the right amount of nutrients available to the bulbs this time of year is important because the roots of the bulbs will still be growing and absorbing nutrients through November and sometimes even into December.


Planting
Again, the bulbs’ label should have all the information you need as far as planting depth, which end faces up, and how tall the plant will be.


Spring care
Any fertilizing should be avoided in the spring while the bulbs are in bloom, as this can shorten the bloom time.


So, are you ready to go dig in the dirt? Don’t forget to get your tools in proper order. A small shovel will work just fine or, you can pick up a handy bulb-planting tool at the garden center. Tobias is a firm believer in stretching before and during bulb planting (and just about any other time as well). You might find yourself in an uncomfortable position while planting so do remember to stretch and protect your back and leg muscles.


Have fun with your bulb planting project. This is a great project that can involve the entire family. Don’t forget to send us a note and let us know how it goes for you. We’d love to see pictures of landscape beds now and again next spring when you’ll be enjoying the fruits of your labor.


Happy Planting!
Rachael and Tobias

Tuesday, September 21, 2010

Divide and Conquer - 5 Easy steps to dividing and transplanting peonies

September - the harbinger of fall. The chores start to add up while the days get shorter and cooler. It is time to start cleaning out landscapes and cutting back fading summer plants. It is also the time to give your peonies some attention. Labor Day is the signal that it is time to cut back peonies for the year. Did you know the peony is one of the few perennials that actually prefer to be transplanted and divided in the fall? Not to be confused with daylilies and hostas that perform better when transplanted in the spring, transplanting peonies just after Labor Day is usually the ideal time to complete this task.

There are several reasons for dividing and transplanting peonies. Peonies prefer a good amount of sun, but can tolerate some shade. If the peony’s location is heavily shaded by a tree or large shrub, the flowering can be reduced. Transplanting the peony to a spot with more sunlight will increase flowering. Another reason to transplant and divide peonies is overcrowding. Sometimes older, more established peonies can become overcrowded and as a result will produce fewer flowers. Dividing the peony will refresh and invigorate the plant.

After the stems have been cut to near ground level, begin digging around the plant. It is best to dig straight down, about 6 inches from the plant using a sharp spade or shovel. If you are transplanting the entire plant, make a few passes around it, digging deeper with each pass (to about 14 inches) and at more of an angle. If you are dividing the plant, determine how much of the plant is to be removed and dig through the plant, segmenting the portion to be divided.


Now you are ready to begin prying the plant upward. It is normal hearthe snapping of the roots at this point. After all roots have been cut or snapped off, the plant can be lifted out of the hole with a shovel and carefully turned over so that it rests on its stems


Carefully loosen and remove as much soil as possible by either rinsing with water or using a sharp stick or screwdriver. If you have an assistant like Tobias, the paws come in handy for this step! Once soil has been removed, the plant can be cut and divided into sections with at least 5 “eyes” each. The eyes are the small pink nodes along the roots that are the stem buds for the next season’s growth.


Each section is now ready to be planted. Dig a hole that is slightly larger than the root mass to be planted. (This is another task that Tobias is quite helpful with!) At the end of this step, the eyes should be planted at a depth of just 1-2 inches below soil level. If they are planted too deep they will fail to bloom for a few years. Peonies prefer well drained soil that is rich in organic matter. Adding peat moss or compost to the soil that is removed during this step is a good idea, but is not required. Place the root mass in the hole and begin to backfill the soil. Once the eyes are covered with soil, add a 1-2 inch layer of mulch to protect the plant from extreme freezing and thawing through the winter. In the spring the mulch can be removed after the threat of a hard freeze has passed.


Even if the peony is planted at the correct depth, poor flowering should be expected for the first year. After two seasons the plant should be back to full flowering potential.

Love peonies, but disappointed in the short bloom period? Tobias suggests planting several different varieties of peonies. Selecting early and late season peonies can lengthen the bloom period to about 6 weeks!

Now that your peonies have been put to bed for the season, it is time to start thinking about bulb planting. Be sure to check back in October for more on planting tulips and other spring-blooming bulbs. Tobias can't wait to dig in the dirt!

Happy Gardening!

Rachael

Tuesday, August 17, 2010

Wanted: Experienced Irrigation Technician

CM's is looking for an experienced Irrigation Technician for immediate employment.

Irrigation Technicians are responsible for trouble shooting and repairing commercial and residential sprinkler systems; performing spring and fall seasonal services; and, on occasion, assisting with the installation of irrigation systems.

Applications are taken by appointment. To qualify, individuals must have a minimum of 2 years irrigation experience, have a valid driver's license and be insurable under the terms and conditions of the company's insurance policy.

CM's offers a competitive compensation package including medical and dental experience, a simple IRA and paid time off. The starting rate of pay is $11-$16/hour, commensurate with experience.

If you or someone you know meets the minimum requirements, please email your resume and salary requirement to hr@cmscustomlawn.com.

Tuesday, August 3, 2010

Selecting New Plants: How to keep from going crazy at the garden center.

Rare is the season when I don’t find myself considering making changes to my landscape. Sometimes it is out of necessity – Mother Nature or the neighborhood pests have a hand (or teeth!) in it. Other times, I may want to change just a plant or two to give my landscape a fresh look. So, off I go to my neighborhood garden center, looking for something to fit a specific spot. Sound familiar?

But wait! Before you grab your keys, you might want to take some time to consider some key elements. You need to know the correct plant size to fill the space. You also need to know how much sunlight the space receives on a daily basis. You also want to be aware of the existing plant colors – foliage and blossoms – to make sure your new plant will complement the existing landscape.

When deciding what size of plant you need to fill a space, it can be helpful to use objects to help visualize what the landscape will look like after the plant is installed and as it matures. Any object will work, so get creative. Items such as a trash can, cardboard box, or empty pot will all do the trick. Tobias likes to use a mouse, ground squirrel, or fish, but those would be for a very small spot. Once you find an object that has the right size, take those measurements with you to the garden center.

How much sun does the plant need? Light requirements are usually listed as full sun, part sun, part shade, or full shade. Their general guidelines are:
* Full sun: At least 6 hours of direct sunlight.
* Part sun: 3-6 hours of sun.
* Part shade: 3-6 hours of shade. These plants will require shade in the afternoon to protect from the intense late day sun.
* Full shade: Less than 3 hours of direct sunlight with dappled shade the rest of the day. This is Tobias’ favorite. Keep in mind that full shade does not mean zero sun exposure. There aren’t many plants that can survive in complete darkness.

Once you have the information about size and light, start reading plant tags. You’ll find the tags have a wealth of information about the specific plant. Most will not only give you the size and light requirements, but will also provide planting instructions and include a picture of the plant so you’ll have an idea of what to expect once it matures.

A cautionary tale: Some information on plant labels may be slightly misleading because the labels are not made specifically for Nebraska. For example, a rhododendron may be listed as full sun because in certain climates it needs full sun, but in Nebraska it needs afternoon shade to protect it from the intense Midwest summer sun. If you have any questions on sun requirements, a garden center employee should be able to help.

Don’t hesitate to forego a plant once in awhile. While you’re at the garden center, take a look around at the garden art. Sculptures, chimes, metal art and the like can add a great deal to a space. Perhaps a trip to the hard goods yard is in order. There you’ll find boulders of all shapes and sizes, many of which can easily be transformed into a bubbling water feature. If you love the hunt and are patient, you might search for a beautiful old bench at antique stores or estate sales.

There are lots of ways to fill in a landscape bed. We hope you enjoy exploring the options throughout the seasons.

Happy shopping!

Rachael and Tobias

Tuesday, June 29, 2010

Growing beautiful roses - no need to get stuck!

Who doesn't like beautiful roses? There are colors and varieties of roses to suit everyone's color pallettes and size requirements. However, like Tobias, roses prefer a nice sunny spot to hang out. The location should be in full sun for at least 5-6 hours for best results. If your planting bed is shaded, a rose garden is probably not in your future. Sadly, you may need to get your rose fix at your local florist's shop.


When pruning Hybrid Teas, prune back to the first set of five leaves, preferably to an outer facing bud. The outer facing bud will encourage outward growth and ensure proper air circulation. Any diseased or dying canes should also be removed.

Tobias suggests a site where the water will drain properly because neither cats nor roses like wet feet! Low lying areas where water collects should be avoided.

Fertilize regularly. A 5-10-5 fertilizer is preferred. Two to three applications should be made during the growing season. Apply fertilizer in the spring, as the buds begin to swell. The second application should be made in June. The third application, weather permitting, should be made in mid-August. If weather continues to be hot and dry through the end of August, skip the third application to avoid new growth that will not have time to harden off before the first freeze.

Mulch! Mulch will help to conserve moisture and keep the roots cool while minimizing weed growth.

Above all, Tobias and I remind you to stop and smell the roses!
Rachael